


Apr 28, 2015
Rules in Microsoft Outlook are a way to automatically manage emails coming into your inbox. The most common type of rule are those that move certain emails to folders based on who it is from or what keywords or phrases are in the subject. A rule can do a lot of other actions as well such as flagging incoming emails or playing an alert when a particular email arrives.
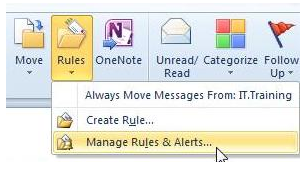
To set up or manage your rules in Outlook, go to the Home tab, click on Rules and then Manage Rules and Alerts…
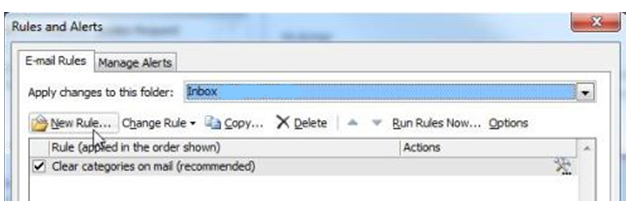
To create a new rule, click on New Rule… in the dialogue box.
You can choose the rule that most closely resembles what you would like to do, but I actually prefer to choose Start from a blank rule because it is just as easy and I get to see all the possible options.
An Outlook rule has a trigger (when it is checked); the two choices are “when emails are received” or “when emails are sent.” The most common one is when they arrive but you can have a rule trigger when you send an email. For this example, click on Apply rule on messages I receive and then click Next. 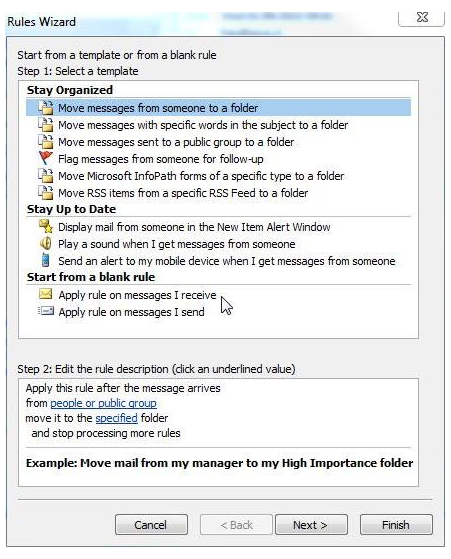
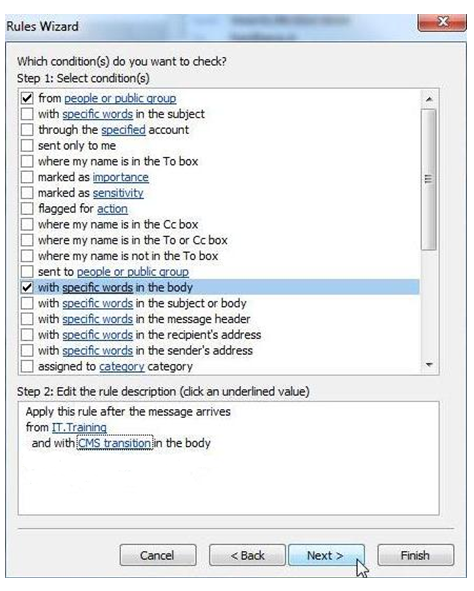
A rule has conditions for when it triggers. Have a look at the list because there are a lot of cool choices. I’m going to choose from people or public group and with specific words in the body but you can make your own choices.
Note: If you try to click on Next right now it won’t let us move forward, because we haven’t actually picked the specifics of the conditions yet.
Down the bottom of the menu click on the blue underlined pieces of the conditions you have chosen to fill in the specifics, in my case, the specific person and the specific words.
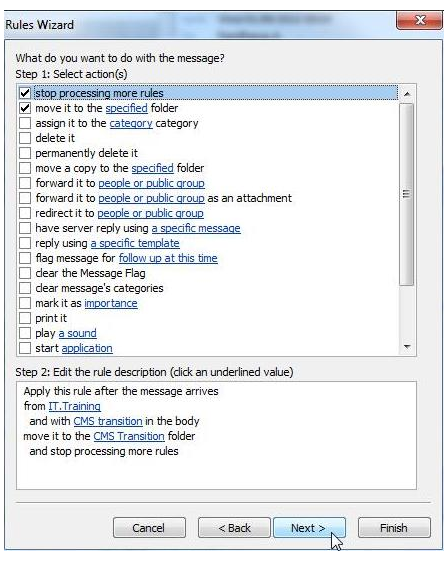
Once you are done, click on Next. A rule has actions, when the rule triggers and the conditions are met, these are the action or actions that happen. Have a look at the list because there is a lot of things you can make happen.
Just like with the rule conditions, we’ll need to click on the blue underlined lines down the bottom to fill in the specifics of the of the action(s). I've chosen the most popular option, which is to move the email to a specified folder and I’ll choose the destination folder by clicking down the bottom.
Note: in the screenshot, I've also ticked “stop processing more rules.” This is useful if you have multiple rules running and a new email comes in that meets the conditions of more than one rule. The rules get checked and run in the order they are listed in the Rules and Alerts menu, and you can rearrange their order, but you may want the higher priority rule to be the only rule applied to the email.
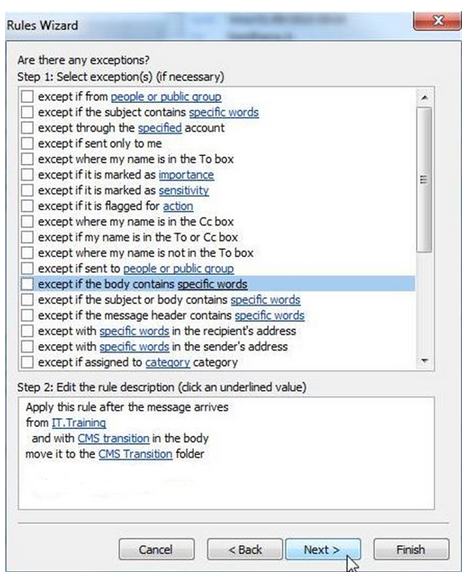
Once you are done, click on Next. A rule has exceptions. If an email meets an exception, the rule’s actions won’t happen regardless of the other conditions we chose earlier. Exceptions are optional so we don’t have to do one.
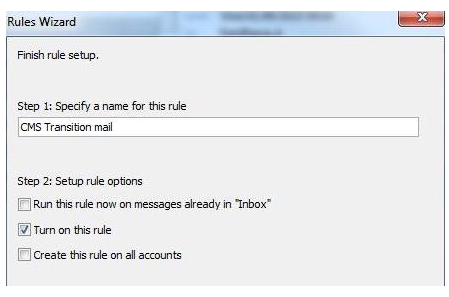
Click on Next. Finally, type in a name for your rule. Notice that you can also tick the box next to Run this rule now… if you want to have this rule run right now on emails already in your inbox.
Click on Finish. We return to the Rules and Alerts menu. Here we can edit an existing rule, rearrange the order the rules get run in using the little up and down arrows, or delete a rule. You can also turn off a rule so that it doesn't run automatically by un-ticking the box next to the rule you wish to turn off.
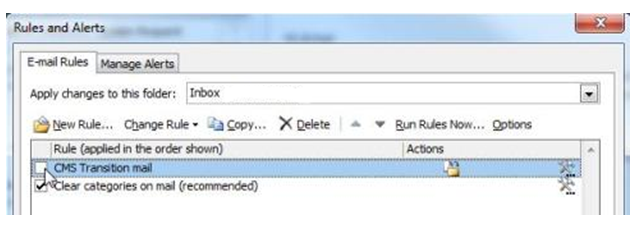
By doing this, you can have rules that don’t run automatically but you can still run them when you want by clicking on the Run Rules Now… button. Using rules should save you a lot of time dealing with emails in your inbox.
You can find more information in New Horizons' Outlook training courses.
How do your Excel skills stack up?
Test NowRelated Articles


About the Author:
Matthew Goodall

Matthew is a qualified Microsoft Office Specialist, Microsoft Certified Applications Specialist and a Microsoft Certified Trainer with over 11 years of hands-on experience in a training facilitation role. He is one of New Horizons most dynamic instructors who consistently receives high feedback scores from students. Matt enjoys helping students achieve real professional and personal growth through the courses he delivers. He is best known for creating “fans” of students, who regularly request him as an instructor for any future courses they undertake at New Horizons.
Read full bio


Next up:
- Termination is possible
- Installing ClockworkWorkMod recovery on your Samsung device
- Are You a Smarter Buyer?
- Create a Windows 8.1 Enterprise Reference Image with MDT 2013
- Group data in ranges of values in Excel
- Different communication styles, Part 1 – the best communicators know this, so should you.
- Have you ever…?
- Round, RoundUp and RoundDown in Excel
- How to scrape a website
- How to create an e-mail template in Outlook
Previously
- Group Managed Service Accounts in Windows Server 2012
- Automate your table of contents in Microsoft Word
- Windows To Go! Part 3.
- The Moth: a bright idea that can help you influence better
- Reduce those pesky meeting request response messages in Outlook
- Upgrading and migrating to SharePoint 2013
- Create a SharePoint list based on an Excel spreadsheet
- Odds are you are going to want to know something about this.
- Tips for managing your team throughout their stages of development
- Quick ways to automate in Photoshop – Part 1: Creating an Action
