

Sep 24, 2013
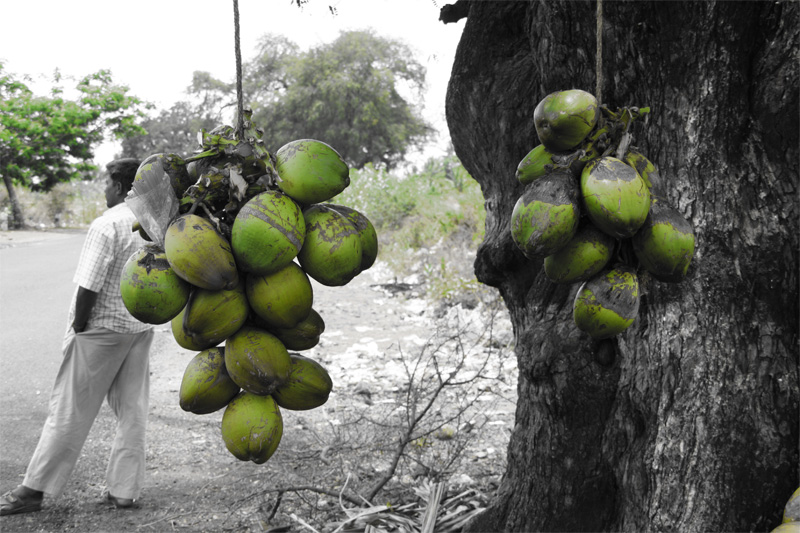
There must be umpteenth ways to produce an image that features both grayscale and colour pixels. We've shown you several in the past and we're going to show you at least one more. It's worth it because the results can be stunning. An added bonus of this technique is you can continue to work in RGB Colour mode.
To selectively desaturate colour from an image:
- Open an RGB image in Photoshop.
- Select the area you want to isolate from the rest of the image.
- Choose Make Selection from the Paths panel pop-up menu, and then click OK in the resulting dialogue box to accept the default settings.
- Choose Select > Inverse.
- Press [c][shift]U ([Ctrl][Shift]U in Windows) or choose Image > Adjustments > Desaturate. The unselected area retains its colour, and the selected area appears as though it's grayscale—all while in RGB colour mode.
Applies to Adobe Photoshop CS6 / CS5 / CS4 / CS3
How do your Excel skills stack up?
Test NowRelated Articles


About the Author:
New Horizons

New Horizons is Australia’s leading corporate training provider, and has been educating business professionals for over 15 years in the areas of Professional Development, Microsoft Office & Adobe Applications, and IT Technical. Our aim through this blog is to bring you relevant stories, articles, and tips & tricks that can help you to improve your skills and productivity in the workplace. Our expert trainers will also be posting their own articles from time to time, so be sure to keep an eye out.
Read full bio


Next up:
- 6 ways to make your leadership and workplace fun again
- What would your business be like if all your staff members were optimistic?
- Influence – after nineteen years I finally get to blend my two great loves!
- Hello, my name is Hekaton – it’s nice to meet you!
- Dominate Your Exchange 2013 Design
- 2 tricks that make formatting text in Photoshop easier
- 6 keys to better IT customer service
- Select layers without using the layers panel in Photoshop
- Influence – Baring it all!
- Open Code in Visual Studio
