Sep 10, 2014

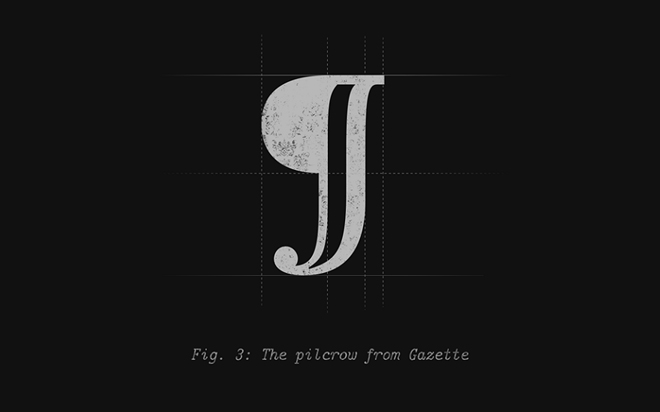
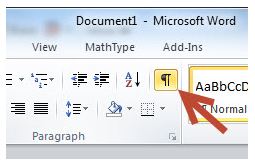
The Show/Hide Button is located in the Paragraph group in the top right corner in Microsoft Word. It looks like a backwards letter “P” but it dates back to Roman times. It was originally called a Pilcrow and was used to indicate where one paragraph ends and another begins. It was originally a letter C in Latin for the word capitulum meaning Chapter and then the stroke was added and then a double stroke and then eventually ended up with the lines extending under the C (¶) and that is the evolution of how we have the funny backward P we use today.
It is primarily used to be able to identify formatting issues in word processing documents that occur because users have hit the enter key too many times and can’t tell because they are not shown. Hitting the Show/Hide button allows the non-printing characters to be revealed. "Nonprinting characters" is Word's term for anything that takes up space or has a formatting function but does not appear on the printed page, including spaces, tabs, page or paragraph breaks, etc. In older word processors, like WordPerfect, the button used to be called the "Reveal Codes" button. The keyboard shortcut to turn this feature on is Shift+Ctrl+8 or you can just select the ¶ button in the upper right corner of the Paragraph group.
In this blog post, I’ll go through some of the symbols which will be revealed by the Show/Hide button, what they mean and why you might or might not want them there.
Paragraph marks 
The paragraph mark represents a paragraph break. You should see one at the end of each paragraph (if there is not one, you'll likely find that you have a problem). Ordinarily, you should not see one anywhere else. By this, I mean that you should not be ending lines with paragraph breaks, nor should you be using "empty paragraphs" to create "blank lines" between paragraphs (in most cases, this is better accomplished with Space Before or After). The ¶ contains all of the formatting relevant to the paragraph. You can select it, copy it, and paste it onto another paragraph to copy and paste the formatting. The last ¶ in the document contains formatting for the entire document (header/footer and margin information, for example) or for the last section if there are more than one.
Line breaks
A right-angle arrow pointing to the left represents a line break, inserted with Shift+Enter. You can use a line break or sometimes called a soft return to start a new line without starting a new paragraph. This is helpful when you want to start a new line within bullets or numbering, but don’t want to start a new point.
Pagination breaks
These include things like column, page, and section breaks, which are a bit more obvious in their meaning. Pagination breaks are applied automatically by Word, or you can add these manually to control where the text should be pushed onto a new column, page or section. To delete these, you can simply select them and press the delete key. The examples below show how they appear in Word 2003 and earlier; the display is a little different (but still recognisable) in Word 2007 or 2010.

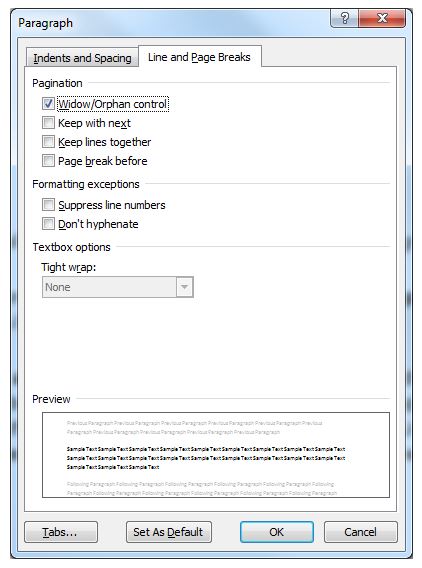
Finally, you will sometimes see a small black bullet in the margin next to a paragraph. This indicates that the paragraph is formatted with the "Keep with next," "Keep lines together," "Page break before," or "Suppress line numbers" property. These settings are found on the Line and Page Breaks tab of the Paragraph dialogue box; accessed through the dialogue launcher in the bottom right corner of the Paragraph group on the Home tab. You can also double-click on the "bullet" itself to bring up this dialogue with the Line and Page Breaks tab selected. Word's built-in Heading styles are formatted as “Keep with next” by default, so you will always see these bullets next to them.
Space characters
In most fonts, and certainly all Windows "core fonts," a· small· raised· dot· represents· an· ordinary· space· Be sure you don't have space · · characters · · where · · they are · · not · · needed. If you are tidy-minded, for example, you won't want a string of them at the end of a paragraph where your thumbs relaxed on the spacebar while you stopped to think.· · · · · · · · · · · · · A degree symbol ° represents a nonbreaking space (Ctrl+Shift+Spacebar), which you can use to prevent words from being separated at the end of a line. This is useful for keeping dates together (so you don't end up with September 5, 2020), as well as initials such as J. P. V. D. Balsdon.
Tabs
An arrow pointing to the right represents a tab character, where you have pressed the Tab key. In a properly-formatted document you should not see more than one of these in a row, but instead you should be using custom tab stops instead.
Cell markers
In tables, you will see one additional character, the universal monetary symbol (¤). Upon close inspection, a circle with four lines radiating from the corners can be seen: ¤. ![]() This is the end-of-cell marker. It is a little like the paragraph mark in that it contains paragraph formatting for the last (or only) paragraph in the cell, but it also holds formatting for the cell.The same mark at the end of each row is the end-of-row marker, which serves a similar purpose with regard to row formatting.
This is the end-of-cell marker. It is a little like the paragraph mark in that it contains paragraph formatting for the last (or only) paragraph in the cell, but it also holds formatting for the cell.The same mark at the end of each row is the end-of-row marker, which serves a similar purpose with regard to row formatting.
Hidden text
One other type of “nonprinting character” that is toggled by the Show/Hide button is Hidden text, which is indicated with a dotted underline. There are a number of clever formatting tricks you can do by formatting text (especially paragraph breaks) as Hidden, but you must ensure you hide it in order to see how the document will look when printed. It is especially important to hide it before generating a table of contents or index; if there is enough of it to affect the pagination, then the page numbers in your TOC or index may be incorrect. Note in particular that the XE (index entry) fields used to generate an index and the TC fields that can be used to generate entries in a TOC are formatted as hidden text, so it is important to hide these before generating the index and TOC otherwise the page numbers may be inaccurate.
Anchors
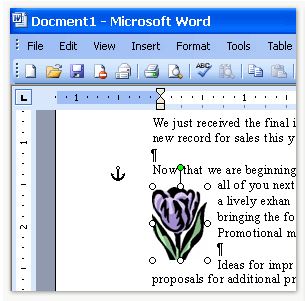
How many times have you had trouble with a blank page at the end of your document and can’t figure out why? Now you know why, by showing the paragraph marks you will likely find there are too many of them at the end and you really only should have one.
How do your Excel skills stack up?
Test NowNext up:
- Connecting people in SharePoint 2013
- How to import a Microsoft Access resources list into Microsoft Project file
- Use conditional formatting to create a Gantt Chart
- Certificate Error, go back to start, do not collect $200
- Telling people that their feet smell and other delightful office conversations
- Action buttons and hyperlinks in PowerPoint
- All about abstract classes in C#
- All about autofill in Microsoft Excel
- Asynchronous programming in C#
- Eliminating hurdles for effective customer service
Previously
- Cloud computing with Microsoft Azure
- I Know!
- Passwords and alternative credentials in PowerShell
- Create an advanced filter in Excel
- The Silver Rule of Negotiation
- Voice Resiliency Features of Lync Server 2013
- Heading styles in Microsoft Word
- Setting up your first Office 365 Tenant account
- 5 steps to create a custom field in Microsoft Project
- Communication Across Generations - Quiz


